
A Complete Guide to Making Perfect Homemade Bread at Home
Bread has always been more than just food. It’s comfort, tradition, and nourishment—something that brings families together around the table. Yet, many store-bought breads today are filled with preservatives, unnecessary sugars, and ingredients you can’t even pronounce. The good news? With this simple, reliable recipe, you can make fresh, wholesome bread at home—better tasting, healthier, and far more satisfying than anything from the store.
Once you master this loaf, buying bread will feel unnecessary.
🌾 Why Homemade Bread Is Worth It
Making bread at home may seem intimidating, but it’s surprisingly easy and deeply rewarding.
Homemade bread means:
- Full control over ingredients
- No preservatives or artificial additives
- Better flavor and texture
- Lower cost in the long run
- Fresh bread whenever you want it
The aroma alone—warm yeast, olive oil, and freshly baked dough—is reason enough to try.
📝 Ingredients (Simple Pantry Staples)
- 4 tablespoons (60 ml) olive oil – adds softness and flavor
- 1 tablespoon (10 g) dry yeast – the magic that makes the dough rise
- 1 teaspoon salt – balances flavor
- 1⅓ cups (320 ml) warm water – activates the yeast
- 4¾ cups (570 g) plain flour – the foundation of the bread
These everyday ingredients come together to create a loaf that’s soft inside with a beautifully golden crust.
👩🍳 Step-by-Step Instructions
1️⃣ Activate the Yeast
In a large bowl, combine the warm water and dry yeast. Stir gently and let it rest for 5–7 minutes.
You’ll know it’s ready when the surface becomes foamy—this means the yeast is alive and active.
2️⃣ Build the Dough
Add olive oil and salt to the yeast mixture.
Gradually add the flour, mixing with a spoon or your hands until a soft, slightly sticky dough forms.
3️⃣ Knead Until Smooth
Transfer the dough to a lightly floured surface and knead for 8–10 minutes.
The dough should become smooth, elastic, and spring back when pressed.
Kneading develops gluten, which gives bread its structure and chew.
4️⃣ First Rise (The Magic Moment)
Place the dough in a lightly oiled bowl, turning once to coat.
Cover with a clean towel and let it rise in a warm place for 60–90 minutes, or until doubled in size.
This slow rise is where flavor develops.
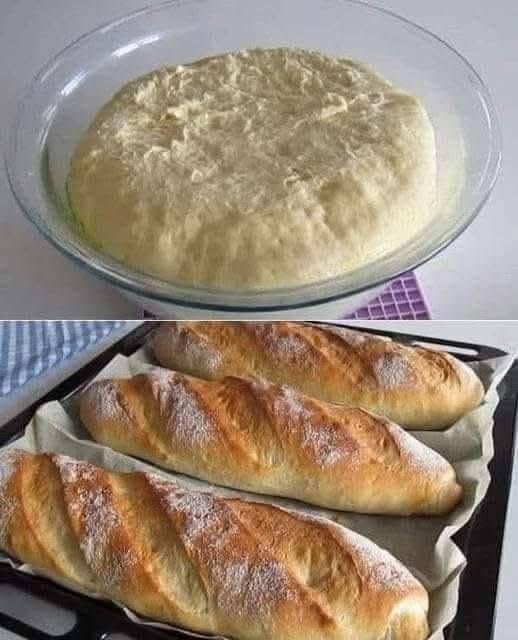
5️⃣ Shape the Bread
Punch down the dough to release air. Shape it into:
- A classic loaf
- Round rustic bread
- Small rolls
Place it on a lined baking tray or into a greased loaf pan.
6️⃣ Second Rise
Cover again and let rise for 30–40 minutes.
This step ensures a light, airy texture inside.
7️⃣ Bake to Perfection
Preheat the oven to 190°C (375°F).
Bake for 30–35 minutes, until the bread is golden brown and sounds hollow when tapped on the bottom.
8️⃣ Cool & Slice
Remove from the oven and let cool for at least 15 minutes before slicing.
This allows the crumb to set properly.
🌟 Pro Tips for Bakery-Style Bread
- Brush the loaf with olive oil right after baking for a soft crust
- Add sesame, poppy, or nigella seeds before baking
- Place a small bowl of hot water in the oven for a crisp crust
- For extra aroma, add minced garlic or dried herbs to the dough
🥖 Storage & Freshness
- Store at room temperature in a cloth or paper bag for up to 2 days
- Refrigerate for up to 5 days
- Freeze sliced bread for up to 2 months—toast straight from frozen
❤️ The Joy of Homemade Bread
There’s something deeply satisfying about kneading dough, watching it rise, and pulling a golden loaf from the oven. Homemade bread connects us to tradition, to simplicity, and to real food made with care.
Once you experience the taste, texture, and pride of baking your own bread, buying it from the store simply won’t feel the same.


Leave a Comment