
Introduction
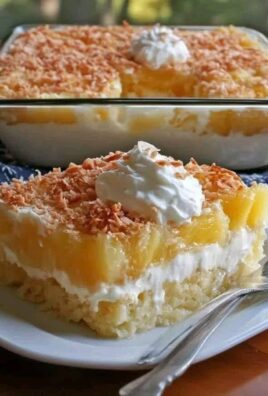
Cherry Bars are a delightful dessert that combines a soft, buttery crust with sweet cherry pie filling and a light drizzle of glaze. They’re easier to make than a traditional pie but offer the same comforting flavor in a portable, shareable form. Perfect for potlucks, family gatherings, or holiday dessert trays, these bars are beautiful, delicious, and always a crowd favorite.
Ad
Ingredients
For the Bars:
Ad
- 1 cup (2 sticks) unsalted butter, softened
- 2 cups granulated sugar
- 4 large eggs
- 1 tsp vanilla extract
- 3 cups all-purpose flour
- 1 tsp salt
- 1 (21 oz) can cherry pie filling
For the Glaze:
- 1 cup powdered sugar
- 2 Tbsp milk (more if needed)
- ½ tsp vanilla extract
Instructions
- Preheat Oven: Heat oven to 350°F (175°C). Grease a 15x10x1-inch baking pan (or similar jelly roll pan).
- Make Batter: In a large mixing bowl, cream butter and sugar until light and fluffy. Beat in eggs, one at a time, then add vanilla. Gradually mix in flour and salt until combined.
- Assemble: Spread 3 cups of batter evenly into the prepared pan. Spread cherry pie filling over batter. Drop spoonfuls of the remaining batter on top (it won’t cover completely, and that’s okay—it gives a pretty marbled look).
- Bake: Bake for 35–40 minutes, or until a toothpick inserted in the center comes out clean and edges are golden.
- Cool & Glaze: Let bars cool completely. In a small bowl, whisk powdered sugar, milk, and vanilla until smooth. Drizzle glaze over cooled bars.
- Slice & Serve: Cut into squares or rectangles.
Storage Method
- Room Temperature: Store in an airtight container up to 2 days.
- Refrigerator: Keeps well for 4–5 days (especially if your kitchen is warm).
- Freezer: Freeze bars (unglazed for best results) in layers with parchment paper between them for up to 2 months. Thaw and drizzle with glaze before serving.
Ad
Leave a Comment