
Introduction: The Allure of Homemade Cherry Pie Bars
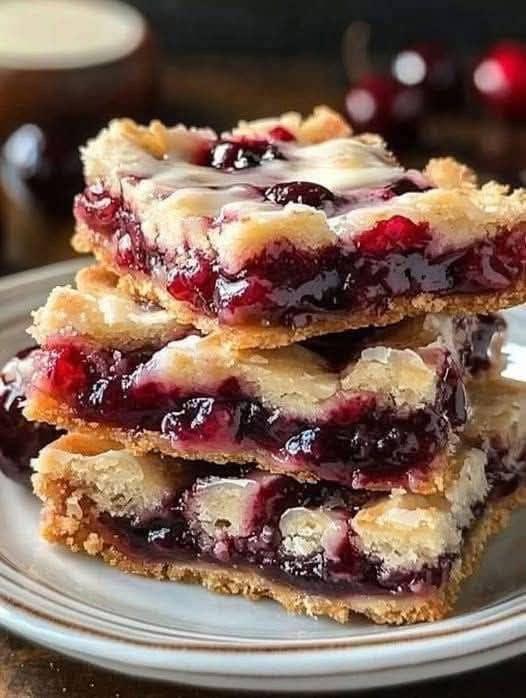
There’s something undeniably comforting about the combination of sweet, tart cherries nestled in a buttery crust and topped with a golden crumble. Homemade Cherry Pie Bars capture the essence of a classic cherry pie but transform it into a handheld, shareable treat that’s perfect for any occasion. Whether you’re hosting a summer picnic, preparing for a holiday gathering, or simply craving a nostalgic dessert, these bars are a delightful way to satisfy your sweet tooth.
What makes these bars so special? It’s the harmony of textures and flavors—the tender, flaky crust, the luscious cherry filling bursting with natural sweetness, and the irresistible crumble topping that adds a satisfying crunch. Plus, they’re incredibly versatile. Use fresh cherries when they’re in season, or opt for frozen or canned cherries for a year-round treat.
Beyond their deliciousness, these bars are also a breeze to make. No need to fuss with pie crusts or lattice tops—just press, spread, sprinkle, and bake. They’re ideal for bakers of all skill levels and are guaranteed to impress family and friends alike.
So, roll up your sleeves, gather your ingredients, and get ready to create a dessert that’s as beautiful as it is delicious. Let’s dive into the world of Homemade Cherry Pie Bars and discover why they’re destined to become a staple in your baking repertoire. 🍒✨
Ingredients
For the Crust and Topping:
- 2 ½ cups all-purpose flour
- 1 cup granulated sugar
- 1 cup unsalted butter, cold and cubed
- ¼ teaspoon salt
For the Cherry Filling:
- 4 cups fresh or frozen cherries, pitted
- ½ cup granulated sugar
- 2 tablespoons cornstarch
- 1 tablespoon lemon juice
- 1 teaspoon vanilla extract
Instructions
- Prepare the Crust and Topping:
- Preheat the oven to 375°F (190°C) and line a 9×13-inch baking pan with parchment paper.
- In a large bowl, combine flour, sugar, and salt. Cut in the cold butter using a pastry cutter or your fingers until the mixture resembles coarse crumbs.
- Press two-thirds of the mixture into the bottom of the prepared pan to form the crust. Set aside the remaining mixture for the topping.
- Make the Cherry Filling:
- In a saucepan, combine cherries, sugar, cornstarch, lemon juice, and vanilla extract. Cook over medium heat, stirring frequently, until the mixture thickens (about 5-7 minutes). Remove from heat and let cool slightly.
- Assemble the Bars:
- Spread the cherry filling evenly over the crust. Sprinkle the reserved crumb mixture on top.
- Bake:
- Bake for 35-40 minutes, or until the topping is golden brown and the filling is bubbly.
- Cool and Serve:
- Let the bars cool completely in the pan before slicing into squares. Serve at room temperature or chilled.
How to Store Homemade Cherry Pie Bars
Proper storage is key to keeping your Homemade Cherry Pie Bars fresh, flavorful, and safe to eat. Here’s a detailed guide to ensure they stay at their best:
1. Room Temperature Storage
- Short-Term: If you plan to enjoy the bars within 1-2 days, store them in an airtight container at room temperature.
- Tips: Keep them in a cool, dry place away from direct sunlight or heat sources to prevent the crust from becoming soggy.
2. Refrigerator Storage
- Longer Freshness: For storage up to 5 days, place the bars in an airtight container and refrigerate.
- Tips: Let the bars come to room temperature before serving for the best texture and flavor.
3. Freezing for Long-Term Storage
- Preparation: Wrap individual bars tightly in plastic wrap, then place them in a freezer-safe bag or container.
- Storage Time: Freeze for up to 3 months.
- Thawing: To enjoy, thaw the bars in the refrigerator overnight or at room temperature for a few hours.
4. Preventing Sogginess
- Layering: If stacking the bars, place parchment paper between layers to prevent sticking and maintain their texture.
- Moisture Control: Ensure the bars are completely cooled before storing to avoid condensation.
5. Reviving Stale Bars
- Oven Refresh: If the bars lose their crispness, warm them in a preheated oven at 300°F (150°C) for 5-10 minutes to restore their texture.


Leave a Comment