
Why You’ll Love This Recipe
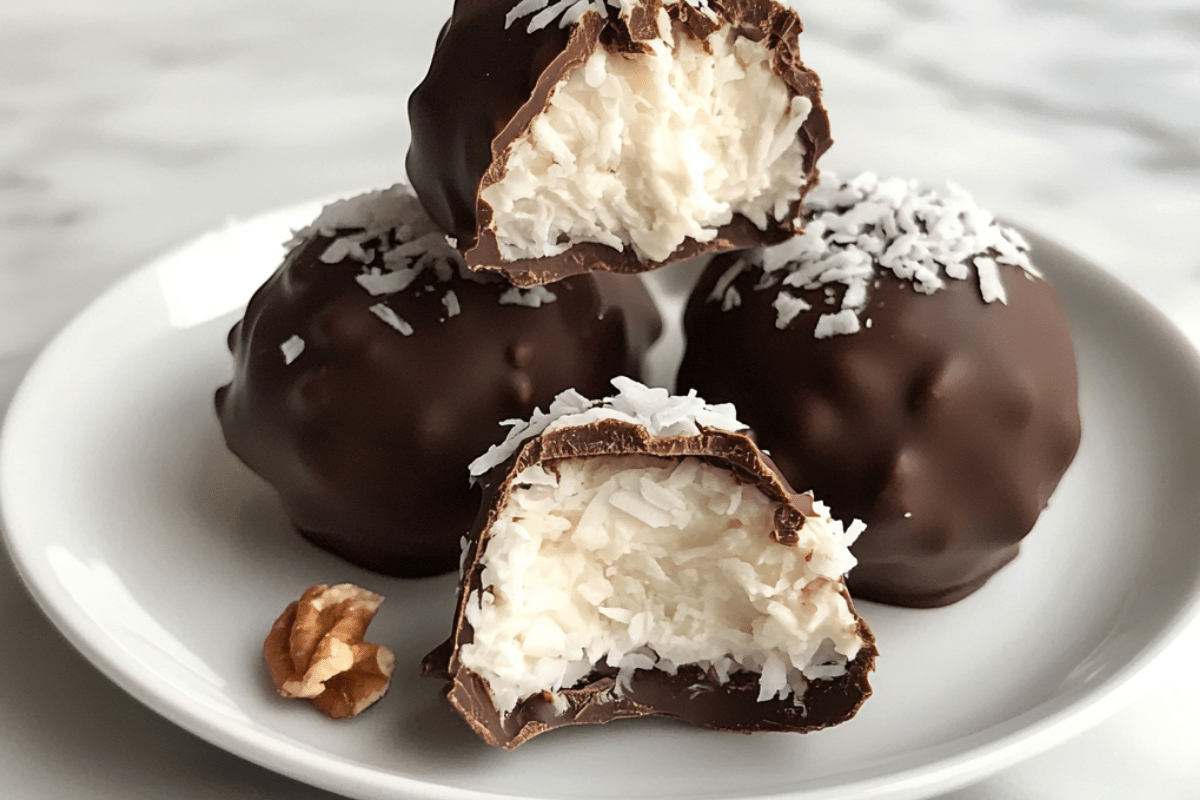
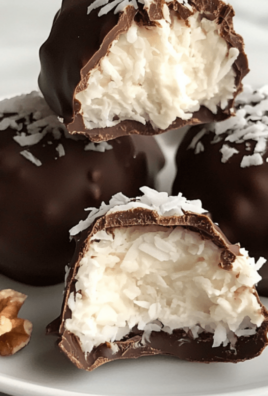
These No-Bake Coconut Cream Balls are an indulgent, yet easy-to-make dessert featuring creamy coconut centers coated in rich chocolate. They’re perfect for parties, holiday treats, or as a delightful anytime snack. Plus, the no-bake method makes them quick and mess-free!
Preparation Phase & Tools to Use
Essential Tools and Equipment
- Mixing Bowl: To combine all ingredients easily.
- Spoon or Spatula: For thorough mixing.
- Parchment Paper: Prevents sticking when forming and setting balls.
- Baking Sheet: Serves as a tray for freezing and setting.
- Fork or Toothpick: For dipping balls into melted chocolate.
Why Each Tool Matters
- Mixing bowl: Large enough to hold and mix the sticky coconut dough.
- Parchment paper: Ensures the chocolate doesn’t stick during the setting process.
- Fork: Provides control when dipping in chocolate.
Ingredients
- 2 1/2 cups shredded coconut: Forms the base of the creamy filling.
- 1 cup sweetened condensed milk: Binds the ingredients and adds sweetness.
- 1/2 tsp vanilla extract: Enhances flavor with a hint of warmth.
- 1 cup powdered sugar: Adds smooth sweetness and structure.
- 1/2 cup chopped nuts (optional): Adds a crunchy texture if desired.
- 8 oz white or semi-sweet chocolate, melted: Provides the decadent coating.
Step-by-Step Directions
- Mix the Ingredients:
Combine shredded coconut, sweetened condensed milk, vanilla extract, and powdered sugar in a large bowl. Stir until the mixture forms a sticky dough. Fold in chopped nuts if desired. - Form the Balls:
Roll the mixture into small balls, about 1 inch in diameter. Place them on a parchment-lined baking sheet. Freeze for 30 minutes to firm up. - Melt the Chocolate:
In a microwave-safe bowl, melt the chocolate in 30-second intervals, stirring in between until smooth and lump-free. - Dip the Balls:
Remove the balls from the freezer. Using a fork or toothpick, dip each ball into the melted chocolate, ensuring they are fully coated. Return them to the parchment-lined baking sheet. - Set the Chocolate:
Allow the coated balls to set at room temperature or refrigerate until the chocolate is firm to the touch. - Serve and Enjoy:
Transfer the coconut cream balls to a serving plate or store them in an airtight container.
Tips for Success
- Prevent Sticky Hands: Lightly coat your hands with a bit of powdered sugar or oil when rolling the balls.
- Ensure Smooth Coating: Tap the fork gently on the side of the bowl to remove excess chocolate before placing the balls on the sheet.
- Customize the Coating: Use white chocolate for a milder flavor or dark chocolate for a richer contrast.
Serving Suggestions
- As a Dessert Platter: Arrange them alongside other no-bake treats for a beautiful dessert table.
- Garnish with Toppings: Sprinkle shredded coconut, crushed nuts, or festive sprinkles over the chocolate before it sets.
- Gift Idea: Package them in decorative boxes or jars as homemade edible gifts.
Common Mistakes to Avoid
- Skipping the Freezing Step: Firm balls hold their shape better during dipping.
- Overheating Chocolate: Melt in short intervals to prevent scorching.
- Using Unsweetened Coconut: Stick to sweetened coconut for the right flavor balance unless modifying for dietary reasons.
Recipe Tips, Storage, and Reheating
Recipe Tips
- Add a splash of almond extract for a nutty twist.
- For a unique flavor, incorporate a pinch of sea salt into the chocolate coating.
Storage
- Store in an airtight container in the refrigerator for up to 2 weeks.
- For longer storage, freeze for up to 3 months. Thaw in the refrigerator before serving.
Reheating Chocolate (if needed)
- If the melted chocolate hardens while dipping, reheat it in the microwave in 15-second intervals, stirring until smooth.
FAQs
1. Can I use unsweetened coconut?
Yes, but you may need to adjust the powdered sugar to maintain sweetness.
2. Can I make these vegan?
Absolutely! Substitute sweetened condensed milk with a vegan condensed milk alternative and use dairy-free chocolate.
3. Can I use milk chocolate for coating?
Yes! Milk chocolate works perfectly and offers a creamy finish.
4. Are there nut-free alternatives?
Simply skip the chopped nuts or replace them with seeds like sunflower or pumpkin for crunch.
5. Can I make these ahead of time?
Yes! Prepare them up to a week in advance and store in the refrigerator or freezer.
Conclusion
No-Bake Coconut Cream Balls are the ultimate quick dessert to satisfy your sweet tooth. With a perfect balance of creamy coconut and rich chocolate, these treats are both indulgent and easy to prepare. Make them for parties, gifts, or just because—you won’t regret it!
Leave a Comment