
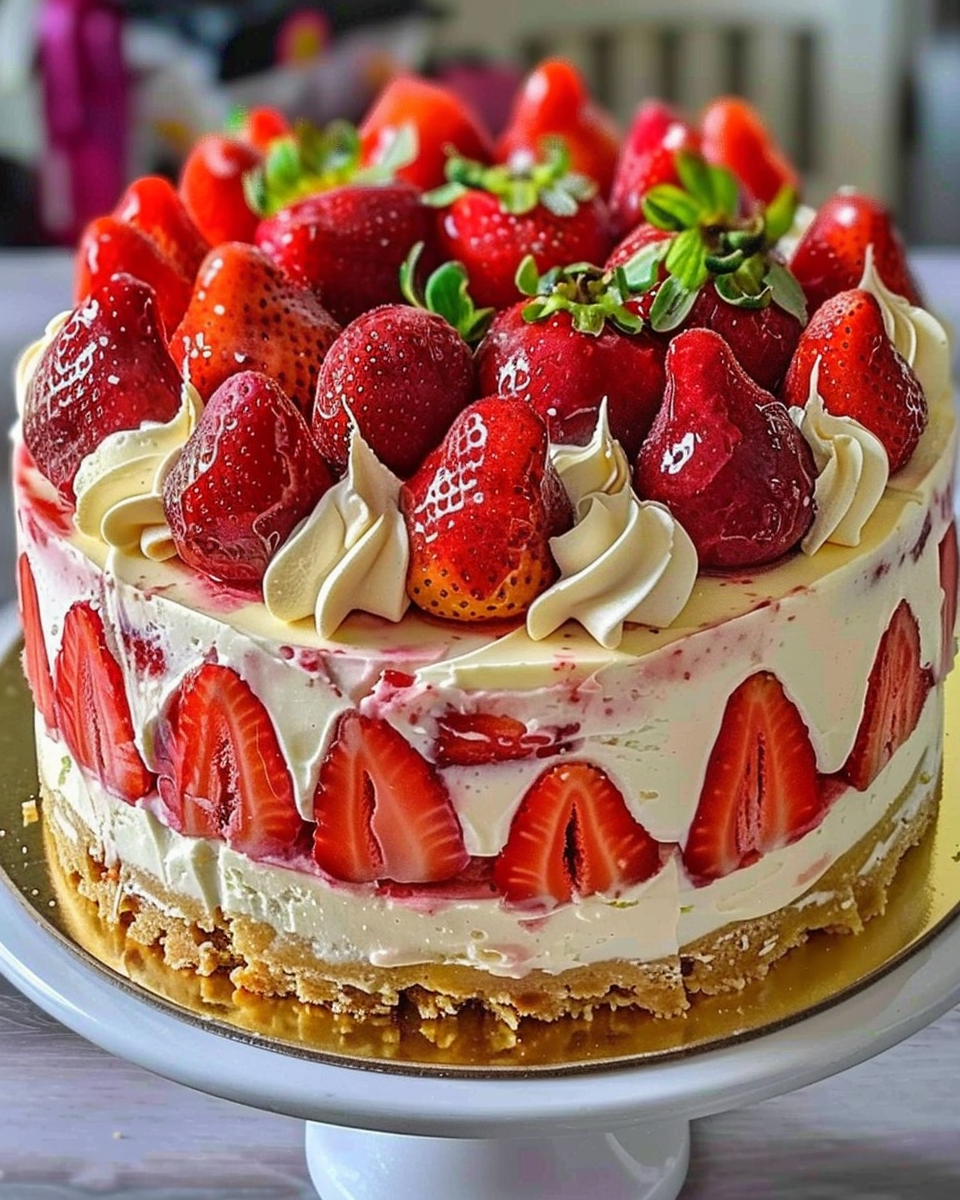
Who can resist the luscious combination of strawberries and cream, especially when it’s a decadent cheesecake cake? This recipe is perfect for any special occasion, from birthdays to anniversaries, or even just because you deserve a treat. Let’s dive into this delightful dessert and see how to create this masterpiece in your kitchen.
Ingredients:
Here’s what you’ll need:
- 2 1/2 cups all-purpose flour
- 2 1/2 tsp baking powder
- 1/2 tsp baking soda
- 1/2 tsp salt
- 1 cup unsalted butter, softened
- 2 cups granulated sugar
- 4 large eggs
- 1/2 cup sour cream
- 1/2 cup whole milk
- 2 tsp vanilla extract
- 1/2 cup strawberry puree
- 24 oz cream cheese, softened
- 1 cup sour cream
- 16 oz cream cheese, softened
- 1 cup unsalted butter, softened
- Fresh strawberries
- Strawberry sauce (optional)
Baking Preparations
Before mixing and baking, let’s ensure we have all the necessary equipment and tips for a smooth baking process.
Necessary Equipment
- 9-inch springform pan
- Two 9-inch round cake pans
- Mixing bowls
- Electric mixer
- Spatula
- Wire rack for cooling
Directions:
- Preheat your oven to 325F. Grease and line a 9-inch springform pan for the cheesecake and two 9-inch round cake pans for the strawberry cake layers.
- Make the Cheesecake Layer:
– Beat the cream cheese until smooth.
– Add sugar, eggs, sour cream, and vanilla extract, mixing well.
– Pour the batter into the prepared pan and bake for 60-70 minutes.
– Let cool in the oven, then refrigerate for at least 4 hours. - Make the Strawberry Cake Layers:
– Sift together flour, baking powder, baking soda, and salt.
– Beat butter, sugar, eggs, sour cream, milk, vanilla extract, and strawberry puree until combined.
– Divide the batter between the cake pans and bake for 25-30 minutes.
– Let cool completely on a wire rack. - Make the Cream Cheese Frosting:
– Beat cream cheese and butter until smooth.
– Gradually add powdered sugar and vanilla extract, mixing until smooth and fluffy. - Assemble the Cake:
– Place one cake layer on a plate and spread frosting on top.
– Add the chilled cheesecake layer and another layer of frosting.
– Top with the second cake layer and frost the entire cake. - Garnish and Serve:
– Top with fresh strawberry halves and drizzle with strawberry sauce if desired.
– Slice and serve chilled.
Enjoy the delicious combination of strawberries and cream in every bite of this delightful Strawberries and Cream Cheesecake Cake! Perfect for any special occasion or celebration.
Serving Suggestions
Best Ways to Serve
- Chilled: Serve the cake chilled for the best texture and flavor.
- Slicing tips: Use a sharp knife, wiping it clean between cuts for neat slices.
Storage Tips
- Refrigerate: Store any leftovers in the refrigerator, covered, for up to 5 days.
- Freezing: You can freeze the cake for up to 2 months; just make sure it’s well-wrapped to prevent freezer burn.
Frequently Asked Questions
- Can I use frozen strawberries?
- Yes, but make sure to thaw and drain them well before pureeing.
- How long does the cake last?
- When stored properly in the refrigerator, it can last up to 5 days.
- Can I make this cake gluten-free?
- Absolutely! Just substitute the all-purpose flour with a gluten-free flour blend.
- What can I use as a substitute for sour cream?
- Greek yogurt is a great alternative to sour cream.
- How can I make the cake more visually appealing?
- Try adding edible flowers,
Conclusion
Creating this Strawberries and Cream Cheesecake Cake is a labor of love that yields a spectacular dessert. The combination of creamy cheesecake, moist strawberry cake, and rich cream cheese frosting is simply irresistible. Whether it’s for a special occasion or just to indulge yourself, this cake is sure to impress.


Leave a Comment