
Looking for a quick, fun, and delicious treat? Easy Cool Whip Candy is your perfect solution! With just a few simple ingredients and minimal effort, this creamy, sweet candy offers a refreshing, cool bite that’s perfect for parties, special occasions, or whenever you’re in the mood for a sweet indulgence.
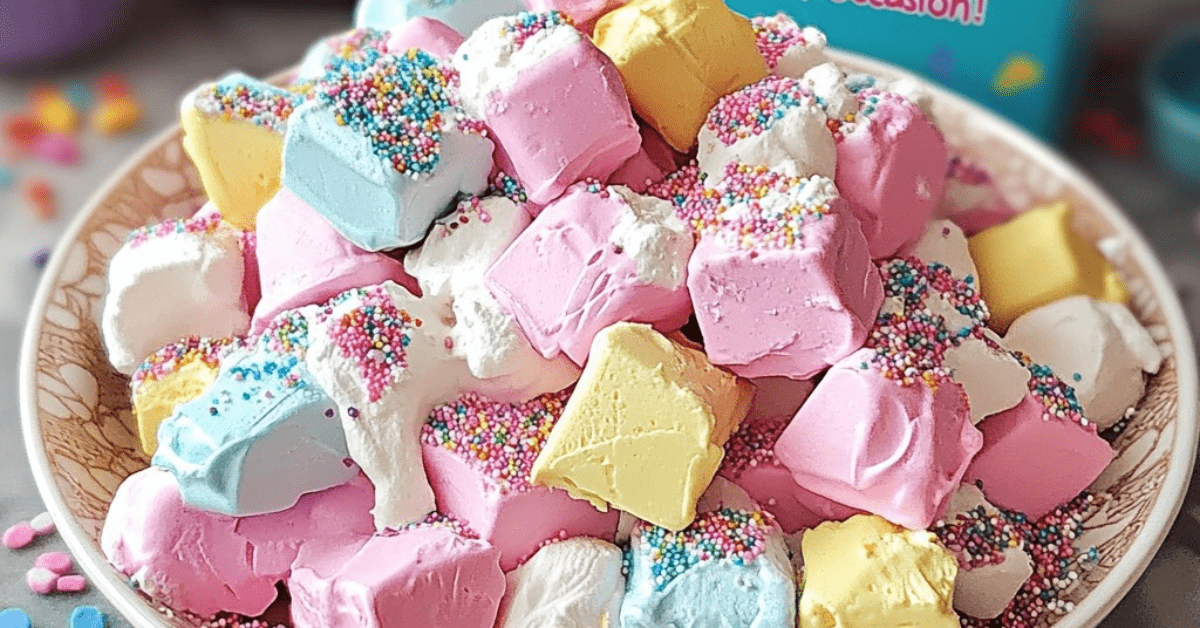
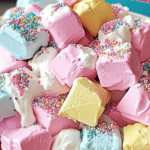
These frozen bites melt in your mouth and offer a light, frosty texture that is sure to please everyone!
Ingredients
- 1 container (8 oz) Cool Whip, thawed
- 1 small box (3.4 oz) instant pudding mix (choose your favorite flavor)
- 1 cup powdered sugar
- 1 tsp pure vanilla extract
- Food coloring (optional for a pop of color)
- Sprinkles or colored sugar (optional, for extra fun!)
Preparation
Step 1: Get Set
Start by ensuring your Cool Whip is completely thawed. Once thawed, gather all your ingredients and get ready to mix!
Step 2: Mix It Together
In a large bowl, combine the Cool Whip, instant pudding mix, powdered sugar, and vanilla extract. Use a whisk or electric mixer on low speed to mix until smooth and thick, resembling frosting.
Step 3: Add Color (Optional)
If you want a colorful twist, add a few drops of food coloring and stir until the color is evenly incorporated throughout the mixture.
Step 4: Get Your Tray Ready
Line a baking tray with parchment paper. This will make it easy to remove the candies once they’re frozen and will prevent them from sticking.
Step 5: Shape the Candies
Using a spoon or small cookie scoop, drop dollops of the mixture onto the parchment paper. You can adjust the size of each candy based on your preference, but aim for bite-sized portions for easy eating.
Step 6: Decorate (Optional)
To make the candies extra festive, sprinkle them with colored sugar or sprinkles. This adds an additional layer of fun and flair to the treat!
Step 7: Freeze and Set
Place the tray in the freezer and let the candies freeze for about 2-3 hours, or until they are firm and fully set. The result will be a cool, creamy treat that’s perfect for a quick sweet snack.
Step 8: Serve and Enjoy
Once frozen, remove the candies from the freezer. Serve immediately for a cool, creamy indulgence that’s sure to delight!
Variation
For a twist on the classic, try using different pudding flavors—chocolate, butterscotch, or vanilla all make great options. You can also experiment with flavor extracts like almond or lemon to create unique variations.
Cooking Note
Ensure the Cool Whip is thoroughly thawed before mixing. If it’s still too cold or partially frozen, it won’t mix as smoothly with the other ingredients.
Serving Suggestions
Serve your Easy Cool Whip Candy at birthday parties, holiday gatherings, or as a fun dessert after dinner. It also makes a delightful treat for a summer picnic or a refreshing snack after a warm meal.
Tips
- If you’re in a rush, you can freeze the candies for a shorter time (about 1-2 hours), but the longer freezing time ensures they hold their shape better.
- For a healthier version, you can use sugar-free pudding mix and Cool Whip Lite.
Prep Time: 10 minutes
Freezing Time: 2-3 hours
Total Time: 2 hours 10 minutes
Nutritional Information (per piece, based on 24 candies):
- Calories: 85 kcal
- Protein: 0g
- Sodium: 10mg
FAQs
Q: How long can I store the Cool Whip candies?
A: Store the candies in an airtight container in the freezer for up to 2 weeks. Be sure to separate layers with parchment paper to prevent them from sticking together.
Q: Can I use a different type of whipped topping?
A: While Cool Whip gives the best texture for this recipe, you can use other whipped toppings, but the result may vary slightly in texture.
Conclusion
Easy Cool Whip Candy is a fun, no-bake treat that’s perfect for cooling off during warm weather or adding a sweet touch to any celebration. With its simple ingredients and minimal preparation, this dessert is an easy and delicious way to satisfy your sweet tooth. Whether you’re serving it at a party or enjoying a quick snack, these creamy, colorful bites are sure to be a hit!
PrintEasy Cool Whip Candyf
- Prep Time: 10 minutes
- Cook Time: 2-3 hours
- Total Time: 2 hours 10 minutes
Ingredients
- 1 container (8 oz) Cool Whip, thawed
- 1 small box (3.4 oz) instant pudding mix (choose your favorite flavor)
- 1 cup powdered sugar
- 1 tsp pure vanilla extract
- Food coloring (optional for a pop of color)
- Sprinkles or colored sugar (optional, for extra fun!)
Instructions
Step 1: Get Set
Start by ensuring your Cool Whip is completely thawed. Once thawed, gather all your ingredients and get ready to mix!
Step 2: Mix It Together
In a large bowl, combine the Cool Whip, instant pudding mix, powdered sugar, and vanilla extract. Use a whisk or electric mixer on low speed to mix until smooth and thick, resembling frosting.
Step 3: Add Color (Optional)
If you want a colorful twist, add a few drops of food coloring and stir until the color is evenly incorporated throughout the mixture.
Step 4: Get Your Tray Ready
Line a baking tray with parchment paper. This will make it easy to remove the candies once they’re frozen and will prevent them from sticking.
Step 5: Shape the Candies
Using a spoon or small cookie scoop, drop dollops of the mixture onto the parchment paper. You can adjust the size of each candy based on your preference, but aim for bite-sized portions for easy eating.
Step 6: Decorate (Optional)
To make the candies extra festive, sprinkle them with colored sugar or sprinkles. This adds an additional layer of fun and flair to the treat!
Step 7: Freeze and Set
Place the tray in the freezer and let the candies freeze for about 2-3 hours, or until they are firm and fully set. The result will be a cool, creamy treat that’s perfect for a quick sweet snack.
Step 8: Serve and Enjoy
Once frozen, remove the candies from the freezer. Serve immediately for a cool, creamy indulgence that’s sure to delight!
Notes
Ensure the Cool Whip is thoroughly thawed before mixing. If it’s still too cold or partially frozen, it won’t mix as smoothly with the other ingredients.
Serving Suggestions
Serve your Easy Cool Whip Candy at birthday parties, holiday gatherings, or as a fun dessert after dinner. It also makes a delightful treat for a summer picnic or a refreshing snack after a warm meal.
Tips
- If you’re in a rush, you can freeze the candies for a shorter time (about 1-2 hours), but the longer freezing time ensures they hold their shape better.
- For a healthier version, you can use sugar-free pudding mix and Cool Whip Lite.

Leave a Reply to Anonymous Cancel reply